Update: create flow with neurostimulation – Radiolab 9-Volt Nirvana
Mihaly Csikszentmihalyi’s concept of flow is a good short-hand for what we should experience in moments of optimal performance. Moving-zen where the self dissolves. Aikido as an art aspires to the demonstration of effortless power – a visual presentation of flow. Resist teaching to the goal rather than to the logic of the necessary effects, otherwise empty choreography will result. This is a grave danger. First and foremost this is, and should remain, a martial art. Flow results from function and expert execution. Flow is not a goal per se but the consequence of dedicated practice.
Open Culture
However, in order to experience a fluid continuity – a progression of discrete iterations presented sequentially – we will explore the basic numerical progression of Aikido’s kihon: Ikkyo through yonkyo (#1 to #4). The very prosaic numbering implies a sequence, each technique is the back up plan for the other in a logical chain.
Ikkyo to Nikkyo (#1 to #2)
First technique – ikkyo – is a primary move and has been discussed in earlier posts. But as a reminder, it is first and foremost an interception. The emphasis on the interception needs be the triceps brachii and humerus. Because the triceps are used primarily for extension of the elbow, controlling the joint above the elbow is the key to locking the upper body and controlling a long weapon. However, the second hand must maintain contact at the wrist (and often it is the wrist-to-wrist contact that appears primary to beginners), but the contact is required because the biceps facilitate elbow contraction – allowing uke to escape ikkyo. Wing Chun practitioners may recognize this as a lap sao exercise.[1]
As uke retracts from the wrist-to-wrist contact, nage needs follow the action and keep contact. Resist the idea of maintaining ikkyo by grasping uke’s hand or forearm – this is a flow exercise and uke is feeding nage the sensory information to follow and inform the action. By maintaining connection, nage will take nikkyo. Often nikkyo is demonstrated by nage ‘rolling’ his wrist around uke’s hand. This is a beginner’s error.

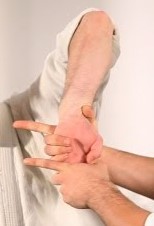
When uke attempts to escape ikkyo, nage should slide his forearm toward uke while maintaining contact then with the back of the thumb acting as the trap (not a fook sao but rather silat #3) to capture uke’s thumb and then execute nikkyo. Nage’s arm pistons along the center line to execute the trap. Please note the hand controlling the humerus has never left uke’s triceps.
Nikkyo to Sankyo (#2 to #3)
Before nage can perfect the nikkyo lock – uke slides his thumb down nage’s chest to escape. Again, nage must forget the original goal of nikkyo and smoothly transition hands to snatch uke’s fleeing hand. This necessitates nage taking the hand that was controlling uke’s triceps, acting as the bracing hand in nikkyo, to then become the new control hand for sankyo.
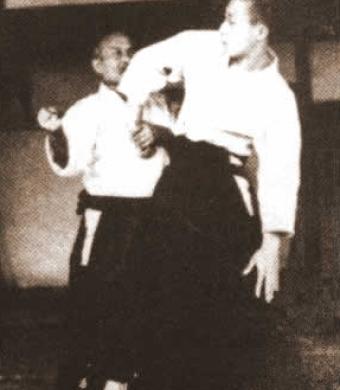
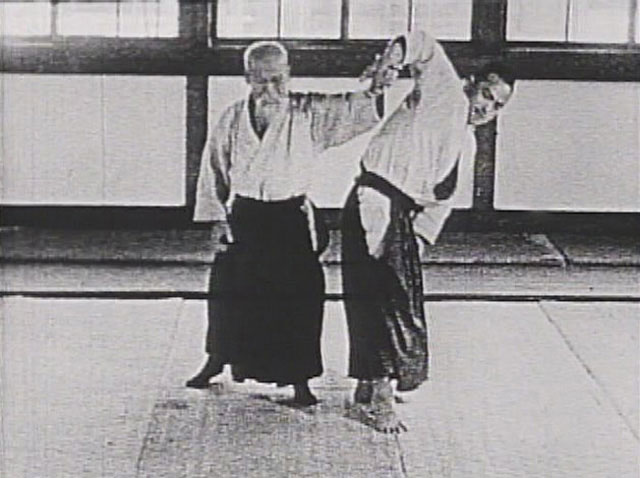
Sankyo is a helical spiral. Starting with the small bones, nage must compress the fingers/metacarpal bones, then corkscrew them to lock the wrist, and once the hand/wrist lock is perfected, control the forearm bones to the elbow. Once the elbow is controlled then the shoulder and body can be controlled. It must be done sequentially because any failure to lock uke’s range of motion will allow a counter. As a training exercise by keeping your index finger extended it will show the direction your blade should flow – first bill sao to the eyes, then a quick rotation down to sever the femoral artery. If you are not properly targeting anatomy you aren’t doing a martial art. I would suggest however, that the proper lock in sankyo is a skeletal lock and not just a wrist lock – the original set up appears to have been a set up for a more devastating atemi (photo above) but then was debased into a wrist lock that may be painful to the uninitiated, but would not be a ‘master play’ since it will fail to immobilize the opponent’s full range of motion.
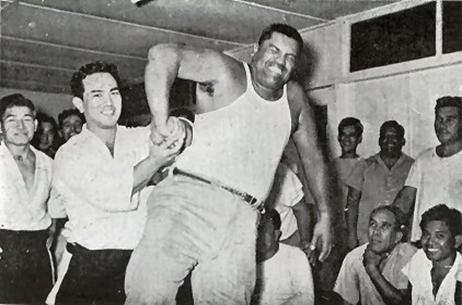
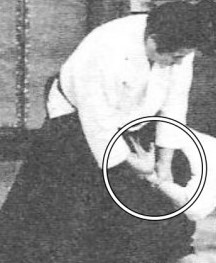
Trained opponents will flow the elbow as a counter to this type of partial impingement. But when done properly, the helical lock will allow nage to control uke’s entire body and then by focusing on using uke’s elbow as a sword to cut down as if severing the leg in a fluid motion. Without the full body lock this sankyo is impossible to execute. In the photo below note that nage is ready to use uke’s arm as a sword – in this instance one-handed. Practice this! A swordsman will have the hand strength necessary to execute this technique – do not allow other’s to judge you by their own dismal standards and abilities. Should you need to, grasp uke with both hands as if in hasso and cut.
Sankyo to Yonkyo (#3 to #4)
However, the flow sequence presumes uke drops his elbow before nage can perfect the lock. So, as uke drops the elbow and breaks nage’s grasp, once again nage must forget his original goal but continue to maintain contact with uke’s forearm in order to transition his hands to the yonkyo position.

This requires deft hand control and a fluid connection – uke must feel free to move so nage must hold firmly but, as was described to me, like holding a bird in your hands – you cannot let it go, but you do not want to crush it either. In the flow exercise we are exploring the contact is primary, but to execute the technique one needs to hit either the radial nerve (nerve impingement – pain control) or the flexor tendons (muscle control). Depending on the opponent’s size, strength, pain threshold, etc., nage must be adaptive in which manner yonkyo should be executed. But the terminal pin is typically done as shown below.
Note that the position will lead to a belly down position and uke could pull his arm back toward his own center – thereby starting the sequence over: nage can counter the escape with ikkyo. And thus the sequence begins anew.
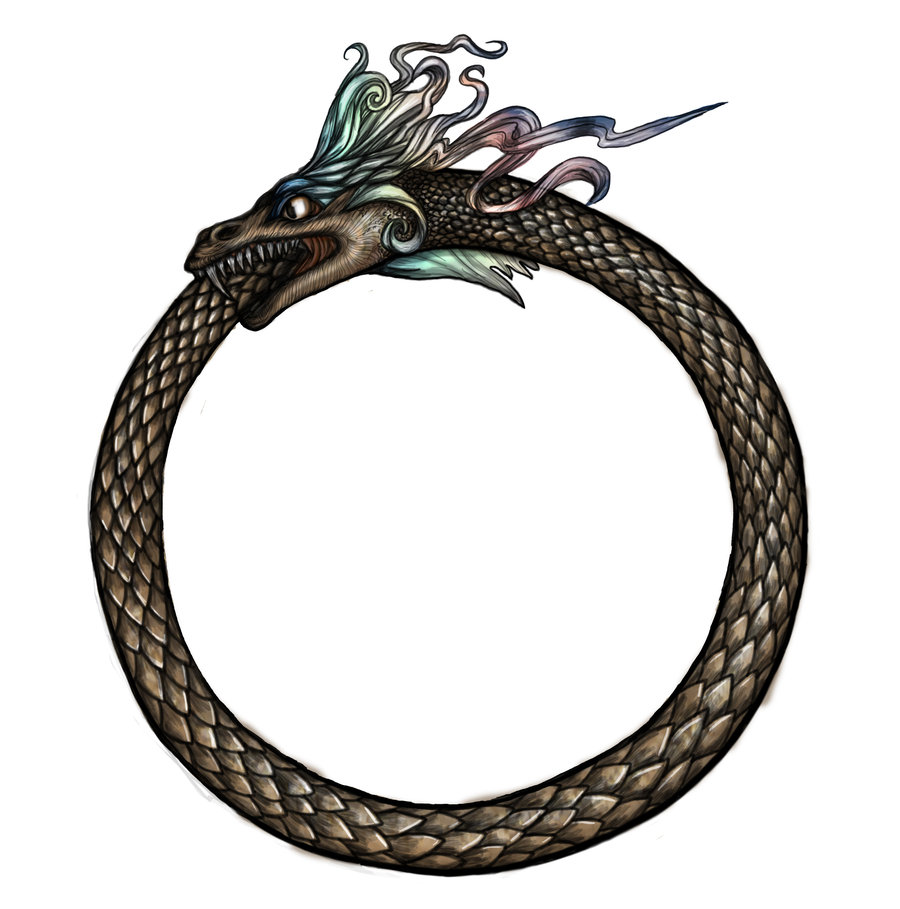
Do not mistake this as a kaeshiwaza or henkawaza training – primarily it is a flow exercise to keep nage and uke connected. It is a sensitivity drill which should also teaches reference points – to allow both uke and nage sense when kaeshi– or henka-waza is possible. For that too implies an ouroboros regenerative cycle: kaeshi forces henka leading to kaeshi …
[I did not demonstrate in class, but one could also move from yonkyo to gokyo and gokyo to rokyo and then rokyo back to ikkyo.]
_________________________
[1] For Wing Chun terminology see >here< which is also copied below to ensure that the content is available
Bil Sao

From a front stance, Bil Sao (finger thrusting arm) thrusts straight out from your center. Bil Sao in application is applied directly out of your center or central-line and is used for filling space, creating an angle of deflection, attacking, or simultaneous deflection and attack.
Bong Sao

Bong Sao (raised elbow arm) from a front stance. Open your fist and move the palm, facing up, into the center. Stop when your wrist is in your center-line, then raise the elbow up to the level of the shoulder; the palm and forearm will rotate out. This hand position creates an angle of deflection and can be used to fill upper and middle zones. In addition, bong sao is an intricate part of the kan sao and quan sao positions.
Fook Sao

Fook Sao (hooking hand arm) extends from the center with the hand curled down and the fingertips together, similar to a bird’s beak. Focus more on your elbow moving in toward the center than on your hand going out. With the position of the wrist and the forearm, Fook Sao creates a tunnel for redirection and deflection.
Fut Sao

Fut Sao (outward palm arm) sweeps directly out from the center of the body. The nature of fut sao is to rise outward and upward. To show complete range of movement of the fut sao hand position, we are going to start with the tan sao position. Fut sao can also be applied to the side, as seen in the 4th section of the sil lum tao. This use of the fut sao is for deflection and attack.
Gum Sao

Gum Sao (jamming arm) is a strike-like jamming motion applied at an angle, which is great for stopping rising attacks like kicks and upper cuts. The work area of the hand is the side of the palm.
Huen Sao

Open your hand and rotate your palm in a circular motion inward at the wrist, completing a circle. In our forms, huen sao (circling hand arm) rotates inward. This rotation of the wrist can move your positioning to the inside out or the outside in. In application, the key is to keep contact with the limb that you are moving around and keeping the rotation in your central-line.
Jut Sao

Jut Sao (snapping arm) is performed with the hand extended out in the center-line. The fingers are pointed downward, with the folded thumb knuckle pointing up. The wrist then snaps down. This is not a physical move. It is a Qi strike or deflection. When practicing, picture your hand as a puppet with someone tugging down on your string. In application, this is a simple movement done in a small range up and down or side to side.
Kan Sao

This hand position is a combination of tan sao (high) and fut sao (low). Tan sao should rise out and fut sao should sweep out of the center simultaneously. This combination can be used to fill space in multiple zones. In addition, pak sao can be used in substitution for tan sao in the high position.
Lan Sao

In a front stance, the arm moves inward. The wrist will stop in the center. Remember that the arm does not form a complete 90º angle so that the hand position does not collapse. Lan sao, as in all Wing Chun hand positions, has multiple uses. The Wing Chun practitioner fills space and creates an angle of deflection that in addition can be used as a stripping motion.
Lop Sao

This is not a grab. It is a thumbless contact grip used to feel and redirect movement. The elbow should remain relaxed and down.
Pak Sao

Pak Sao comes directly out of the center of the body. It is used to fill space and create an angle of deflection. In practice exercises, the contact point is on the side of the palm, below the little finger. In application, the contact may vary from the side of the palm to the lower mid-point of the lateral side of the forearm.
Quan Sao

This hand position is a combination of tan sao (high) and bong sao (low). This combination can be used to fill space in multiple zones. In addition, pak sao can be used in substitution for tan sao in the high position.
Tan Sao

From your side, open your palm and move it up and out of your center as if it is moving on an invisible track up a mountain. Your elbow should be a fist-and-a-half away from the body. Placing your fist on your chest and extending your thumb will give you this representation.
Tie Sao

Tie Sao extends out from the center of the body, around the level of your waist, and then rises up to the level of your nose. Your fingertips should be together, similar to the fook sao hand position. This is one of the few long bridging techniques in the Wing Chun system. Moving an extended arm such as gum sao to a raised arm position like tie sao would be an example of long bridging.
Tut Sao

Tut Sao works off of a contact point. By sliding down one’s arm, you will take the bridge right to the opponent.
Wu Sao

Wu Sao, or the rear hand, is the protecting or covering hand in attack or defense.
[2] I recall Chiba Sensei telling the story that O’Sensei changed his positional stance because a judoka once nearly swept his lead leg when doing nikkyo in this manner. New information informing technique and execution. This single photo serves to admonish the astute: the moment you think you know something coincides with the moment you cease to learn. Find out how to make it work – not why it won’t.

9 thoughts on “FLOW SEQUENCE”