
In a self defense scenario, reaction time is one of the most important types of speed to cultivate. In traditional Japanese arts, iaijutsu is an example of a quick draw response system, now become an ossified art.[1] The Drawpoint method of deploying a knife is a modern cognate alive with potential.
Drawpoint is Comtech’s refinement of Pekiti Tersia Kali. Master Keating has done the hard thinking for us by distilling a traditional system to a modern context. While there is no substitute for hands-on instruction and training:
Buy the DVDs for your reference library.
The most distinctive feature of the system is its simplicity: draw and point.
The draw in Drawpoint refers to producing the knife quickly from a sheath. For this to be done effectively the right kind of knife and sheath must be used. When the system was developed in the early 90’s very few came with a great sheath system to carry them. This is why the Drawpoint method was initially focused on using the Gryphon M-10; a relatively small sized fixed blade with a secure kydex sheath. The sheath firmly held the knife in place while allowing for an immediate drawstroke without needing to unsnap or otherwise free the knife handle.
Equipment should never become a mere fetish, but the complementary pairing is available:

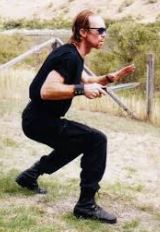
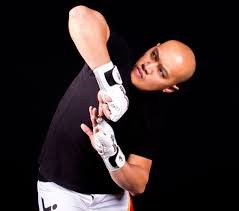
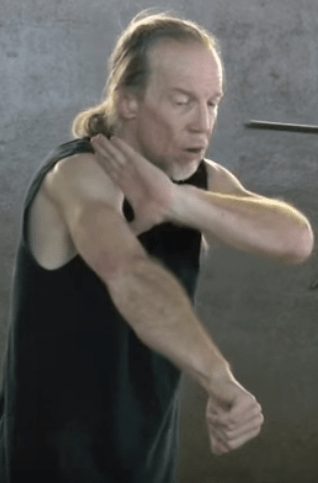
The draw is a quick response to an assailant. The fixed blade is open carry in a sheath (Oregon Knife Up law) with the blade pointed to the rear. Once you establish a master grip on the handle the knife is quickly presented in a edge-in (the “pakal”) grip. There are two primary grips, forward and reverse. Then there are two blade orientations, edge in and edge out. Together these are the 4 edges of the blade. The edge-in grip is dictated by the logic of the system. As Master Keating will readily admit, the grip is not a panacea, the grip is dictated by the logic of the system which is a close quarters extreme protection scenario. It is not a duel or a contest of styles. Drawpoint is a trained response to a surprise and violent assault.[2]
The primary reason for the edge-in grip is self-protection. Meaning the blade is held so that in a close-quarter fight where you use the live hand to check an opponent’s cut, an edge-out presentation has a greater chance to cut your actively intercepting hand. The system reduces the chance to self-cut. The secondary reason for the edge-in presentation is the capture.
The basic drills for the reverse grip:
Rolling pick
Similar to chain punching (Lin Wan Kuen), a rolling pick trains the initiating response – draw, extend, flick to point, pick, return. The counter is a stop hit press down and counter pick.
Because you draw the knife in reverse grip, your counter strike is like a punch, knife butt leads, necessitating a “flicking” action to deploy the point. Developing this skill requires a good number of repetitions to get the mechanics down. Your target is the bridge of your opponents nose, between the eyes. The pick requires accuracy more than force because as your opponent turns to avoid the knife point, they will present an eye.
Bob is a great feedback tool with enough resistance to force you to retain your grip while you hit the eye. Aim small miss small.
Both players get equal training time and play both the offense and defense simultaneously. Once a training pace is established, the players can introduce the traps. The trap is a response to an induced flinch in the assailant. A flinch is a non-trained “reflexive” response.
We are training with the goal to condition our reflexive response to draw and point and to exploit the ‘reflexive’ responses in others.
Inducing a flinch response is ABD – Drawpoint exploits this by using the blade in capture method – as the hands come up to defend the eyes, the scissor action of the blade-in grip captures the opponent’s hand.
Cover and Slash
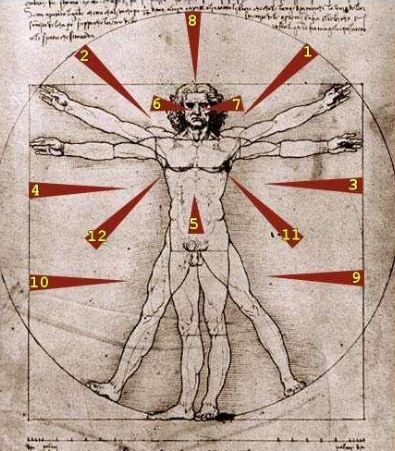
In reverse grip, Player A strikes yokomen (angle 6), do (slash), gyaku-yokomen (angle 7), do, yokomen, repeat. Player B’s counter pattern intercepts the yokomen, executes an upward slash to the bicepts/tricepts and counters gyaku-yokomen, then pivots to intercept the gyaku-yokomen to again upward slash and counter yokomen.
Review the pattern: this is a variation on a thrusting triangle tap drill. In the thrusting triangle both players stab 5, 6, 7 while the live hand [3] stops each thrust in time. Where the thrusting triangle uses the point exclusively, Cover and Slash uses both the edge and point.
Connect points with lines and see that the lines define points. When you connect the thrusting points with a contouring cut the power of the drill emerges.
Counter for Counter
For the second day of training, we ended with a counter for counter drill which I present with an Aikido-vocabulary gloss:
Player A attacks yokomen (angle 1) – Player B chases the strike and forces the strike to the belt line (cut back of hand)
Player B counter-attacks with chudan tsuki (stab to the bladder) – Player A wings (bong sao) to intercept the thrust, cuts up and strikes with the butt of the knife to the face.
Player B stop hits the butt – Player A flips the blade to pick the eye.
Player B roof blocks (draw cut defense) and strikes yokomen to start the sequence again.
Processing this information, I have to translate to Aikido in order to work on it in class: I hide the drill. While I did break it down in segments to show the stops, Aikido plays only the line. The entire drill is a ki-no-nagare flow from gyaku-hanmi to ai-hanmi katate dori ikkyo. The kali breaks the flowing line to its constituent target points, and adds the slightly unfamiliar rhythm. At first chasing the yokomen hand (follow from the outside line rather that intercept on the inner), but in ki-no-nagare, even that is gyaku-hanmi katate dori tenkan to feed back to ai-hanmi. The lines are universal. Connect the points in the kali and you have contouring, de-emphasize the bunkai targeting, emphasize the connected energetic flow and we are back to Aikido.
Any use of the knife in reverse grip is the same line as an elbow strike.
Think on these connections.
_________________________________
10/12/19 – 10/13/19 Keating Hellbows and Drawpoint Method Seminar
Brian Chilton’s Notes and Observations
Hubud Lubud is the foundational exercise. One must know Hubud to progress.
Angles of Attack – Inosanto/LaCoste Angles – these vary from school to school but the first 5 are relevant here.

Review Keating’s Martial Arts: FMA –The Top Ten Sins In Hubud Lubud Training
For Keating, there are three ranges to practice – Long, medium, short. Each range will slightly alter Hubud Lubud.
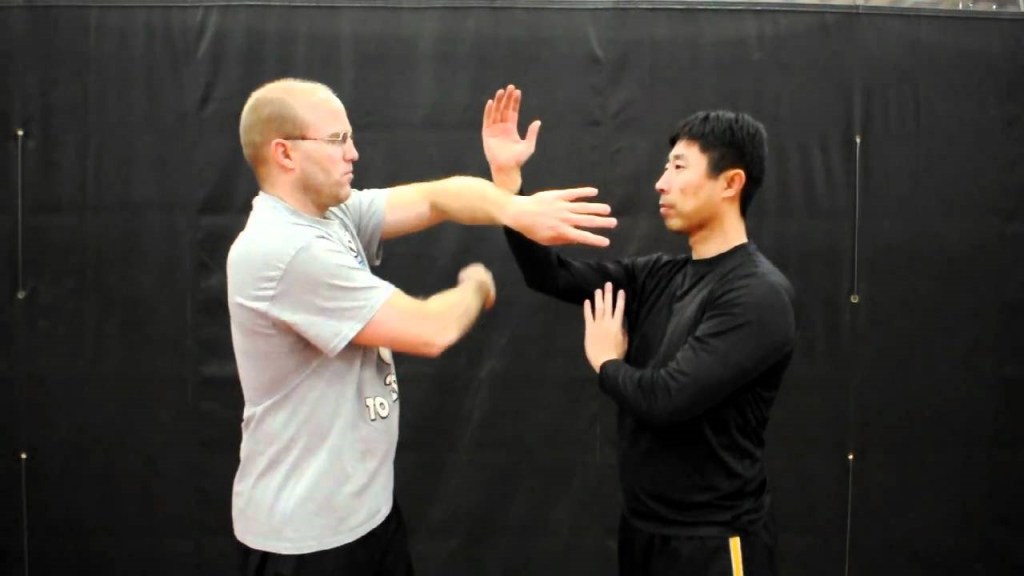
Long range (Panantukan boxing range) – Assume right hand attack.
- Uke uses an Angle 5 punch.
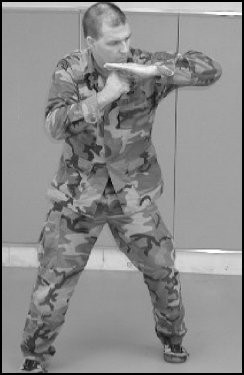
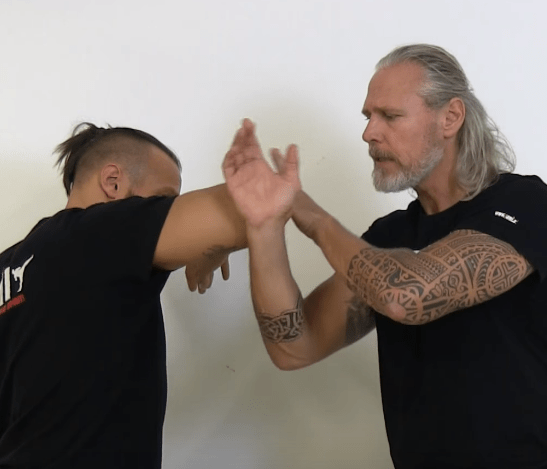
- Nage raises her left hand as if to take a drink from a cup and parries the strike with her palm.
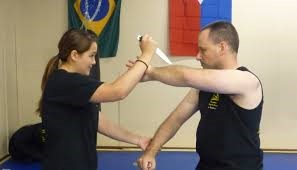
- Her right hand comes up into the Ʌ created by the connection of her left-handed parry and his Angle 5 attack. Notice she will need to shift her center to face the training wall for her to escape his check hand.
- She raises her right hand into the Ʌ and cuts down onto his right forearm, allowing her to trap his right arm with her right palm.
- She removes her right palm and replaces it with her left palm.
- She is now Uke and punches Angle 5 with her right hand and the drill repeats.
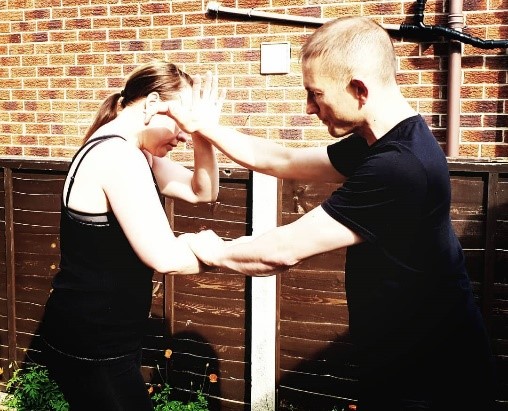
Medium range – the attack becomes and Angle 1. Keating assumes the attack is like a hammer-fist and is crashing down onto Nage. As a result, Nage must receive this energy differently. See below.
- Uke attacks with his/her right using an Angle 1 attack
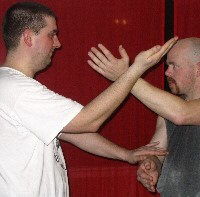
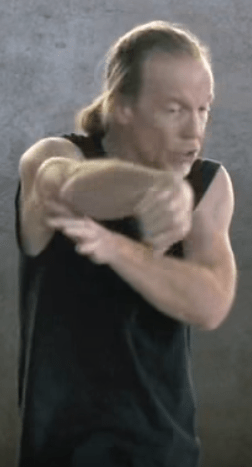
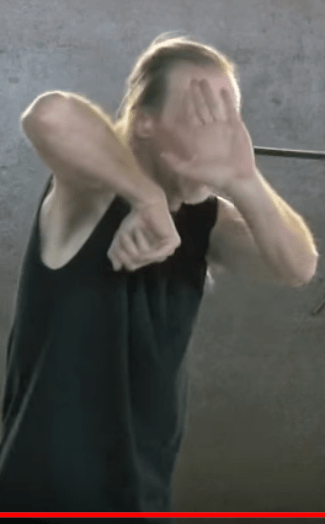
- Nage raises his left hand as if to feel his forehead with the back of his left hand. Old timers at Portland Aikikai will remember Mike Cavalle teaching the southern Belle “Oh My” response.

*This response is dangerous as the inside of the wrist is exposed to a knife attack.
An alternative response is blocking out with the backside of the left arm as if one had a shield.
- From here, the drill is identical to Long range where Nage raises his right hand into the Ʌ and cuts down. See steps 4-6 in Long range except change the final attack to an Angle 1.
Short range is grappling range or Dumog = elbows range. The attack is an Angle 1 Elbow attack.
- Uke attacks with his right elbow using an Angle 1 attack
- Nage can receive or meet the attack like in Medium range with the Oh My technique. It is imperative to cup Uke’s elbow. If possible, meet the attack at the pinnacle as if it were a sword at the peak of its arc. This will cause Nage to be under the elbow and Nage will gain superior leverage. But this is a drill so once the elbow is cupped, perform the rest of Hubud like Long and Medium ranges.
- Nage’s right hand comes up into the Ʌ created by the connection of the left-handed cupping to the Angle 1 elbow.
- Nage’s cut is now just above Uke’s elbow but the remainder of the drill is the same. Nage will become uke and deliver and Angle 1 elbow.
**An Alternative response and the one Keating showed was to receive Uke’s right Angle 1 elbow with your own LEFT Angle 1 elbow. Nage becomes Uke immediately and with his left Angle 1 elbow. The drill would become a left, right, left, right circular, alternative elbow drill.
Other insights around Hubud Lubud – Hubud is Heaven Six. Hubud Lubud combinations are infinitesimal. Hubud Lubud allows for maximum reps in a very short period of time. Hubud Lubud is Yin and Yang in motion.
Swithching sides in Hubud Lubud – Keating went off in the only way James Keating can about being able to do everything from both sides. We have a right side and a left side. Switching sides smoothly in Hubud Lubud is challenging for many. Keating’s solution is to utilize the “Wiping Down method”.
Too many of today’s students will not have seen the Karate Kid from the 80s. Make it a homework assignment because the Wax on, Wax off, Paint the Fence and Sand the Deck motions are great teaching aids. Keating’s wiping motion is “Sand the Deck” from the Karate Kid. It is a circular outside in, clockwise motion.
For switching in Hubud Lubud, Nage receives whatever angle of attack and “wipes down” – a circular outside in, from 12 o’clock to 6 o’clock motion. Nage will do this twice and then attack as Uke.
- Uke attacks Angle 1 with right hand.
- Nage wipes with left hand in and outside in, clockwise motion, 12 o’clock to 6 o’clock.
- Uke attacks again with the left hand from Angle 1.
- Nage wipes again but with the right hand doing so in an outside in, down, clockwise motion.
- NOW, NAGE becomes Uke and attacks with the left hand Angle 1. The switch has occurred and Hubud Lubud continues.
5 Part Elbow Shields – this kata is a series of movements to allow one to study movement from an elbow perspective.
Keating’s Elbow Shields can be broken down into horizontal, vertical and circular. All of his shields have a strike attached to them. The shields are performed from the same side for all versions. They can be, and should be, done from both sides.
- Horizontal – The movement is palm parallel to the ground, the elbow is also parallel to the ground and travels from the shoulder to sternum. The strike is then a back fist the nose.
- Vertical – From the back fist, drop your elbow straight down deep into the hip and explode up with a punch that finishes palm down (your punch from the hip begins palm up). Raise the right arm to shield the side of your head.
Bring the shield around the head and strike down at an angle 1 on the nose with a monkey paw strike.

- Circular – From the previous strike, drop the right elbow down and rotate the elbow across the front of the chest. The right thumb is pointing to the right. Extend and strike with a back fist. Then, rotate the elbow out and above your right hear and strike down. These moves encompass the shield of paiyon and roofing actions.
Elbow Drills –
- Horizontal drill – Uke throws a right handed punch like a hook. Nage, with his left hand, parries the strike into his right, horizontal elbow. Uke throws from the other side and Nage, with his right hand, parries the strike into his left horizontal elbow.
- Vertical drill – Uke throws a straight right-handed punch or jab. Nage, with his left hand, parries the strike into an ascending, right, vertical elbow. Repeat from the other side.
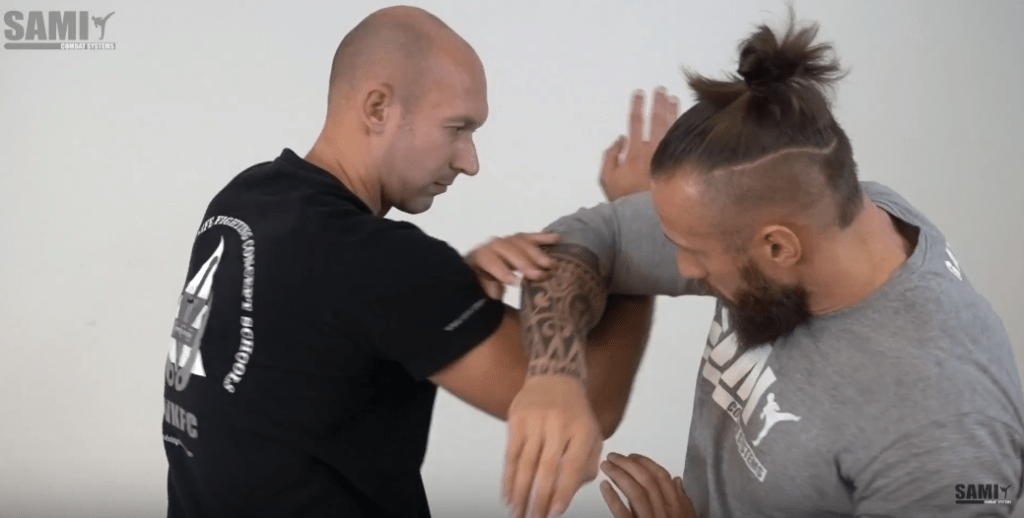
- Hammer and Anvil drill – this is a flow drill that gives both players the chance to block elbow strikes and to hit using the hammer and anvil. Hammer and anvil is placing one hand behind a target and hitting the target with the elbow (or fist) from the opposite hand. The target for this drill is the bicep.
- Start – Uke places the left hand behind Nage’s
right tricep. Uke delivers an Angle 1
elbow strike straight down on Nage’s bicep (softly, don’t kill your
partner).
- After delivering the strike, Uke with the right hand delivers a back fist to Nage’s face.
- Nage’s right arm was just hit. With the left hand, block Uke’s strike to the face.
- This creates and X, like Hubud, reach under and grab Uke’s right tricep just above the elbow with the right hand.
- Pull the tricep toward you. Put the left hand behind Uke’s tricep and strike down with your right elbow.
Other elbow Drills
-One person just feeds and blocks, the other does hammer and anvil.
-One person covers, the other hubuds and hammer and anvils with strike. It’s a walk up the arm – horizontal elbow and strike.
-Incorporate wipes down to an elbow, explore different patterns and strikes.
Entry – Salute System – Larry Hartzell
- Uke punches with right hand.
- Nage parries with the left and steps left off the line to the outside while giving a salute with the right hand (elbow shield).
- Nage now turns to the right and gives a salute with the left hand. This vertical elbow strike Uke on the way up. On the way down, it clears Uke’s right arm and opens Uke’s center line.
- Nage can now hit again with the right elbow.
This is just and entry – a road map. There are many combinations one can use here. Explore all options. Left and right side.
Cover and Slash – Icepick (reverse) grip vs Hammer (standard) grip.
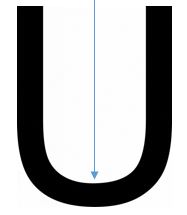
One Player in standard grip feeds the 6 and 7 attacks. The motion follows a “U” pattern. At the top of each side of the “U”, this player pokes. The finger nails are always toward the sky.
The other player in reverse grip will be covering and slashing. CRITICAL – this player must start and finish at the bottom of the U after every repetition.
Assuming Player one is feeding right handed 6’s and 7’s, Player 2 will check the hand and slash the forearm or Player 2 will check the forearm and slash the hand.
-Player two to remove knife and try with Elbows.
Random Stick Play – Exploring Elbow Disarm opportunites – there are many.
Each Player with a stick – Angle 1 attack, Angle 2 attack, – then number 3 elbow shield to disarm. – Step back.
*This next section begins blending the Draw Point method with elbow knowledge. Elbows motions are the same as reverse knife grip.*
Reverse Knife Play Drills – 4 corners introduction – Box Drill. The X’s represent targets to strike with the knife in reverse grip.
-When the strikes are high, the checking hand fingers needs to be high-to-the-sky
-When attacks are low, the checking hand fingers are down to the ground.
-Explore this with high-line hubud and low -ine Hubud.
Rotary Knife – this is like hitting a punching bag but one hand is checking and the other has the knife in reverse grip. The knife flicks out at the other player’s eyes. Use eye protection.
Using a stick allows for Punho (butt-end of the stick) practice. The stick goes under the arm and the rotary motion causes the sick to go back and forth under the arm. If it comes out, the range is medium range. It should stay under for short range.

Reverse-grip knife – Keating teaches the blade edge should be toward you as this creates a way to trap between your forearm and the blade. It also prevents one from cutting themselves in upper and downward slash motions.
Palasut Drill – Reverse against Standard grip. Same U shape as Cover and Slash drill.
- Uke in standard grip, delivers an Angle 1 attack.
- Nage in reverse grip, intercepts and passes Uke to the right side and lifts Uke’s knife arm (lift the arm above the elbow on the tricep side.
- Nage attacks the Uke’s kidney.
- Uke must step back to escape
Punyo Sumbrad on YouTube as well.
____________________________
[1] Ossified insofar as the form takes precedence over substance and legally you can carry a knife every day, but not a katana.
[2] There are other methods. Michael Janich was originally inspired by the Drawpoint method but adds his flavor in Martial Blade Concepts.
[3] The Live Hand is the non-weapon hand and is used to interpose and defend against your opponent’s weapon hand. Review Pete Kautz’s summary on training the live hand.
