Cautionary Reminder
This is aiki-weapons theory. It is designed to teach harmonious action, ki-musubi, not the full spectrum of combat efficacity. The emphasis on sequential action and clean initiative exchange presumes an encounter between near-equals, where both partners participate in the developmental logic of the drill. Actual combat is rarely so orderly. Real engagements fracture rhythm, hide intent, and reward deception: feints, broken timing, off-beat entries, and tactical trickery. None of which are examined here. This paired form is a pedagogical device, not a tactical prescription.
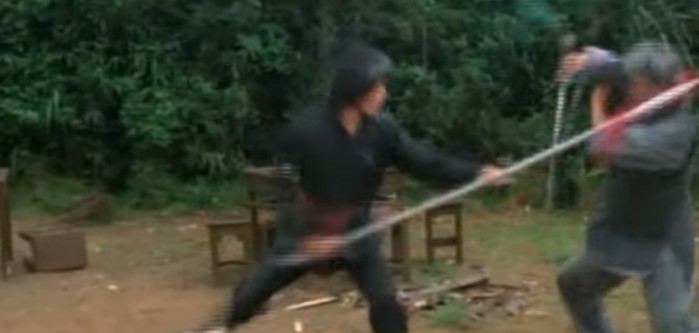
Over the last several weapons classes I have used the 8-Count Kumijō as scaffolding for a jō-versus-bokken paired kata. The jō-bearing player executes the exact eight movements from the original sequence. What changes is the interpretation: against a sword, every motion acquires a slightly different tactical rationale.
To frame the encounter, remember that the swordsman is at a structural disadvantage. The bokken is significantly shorter than the jō. Therefore:
Sword strategy: close distance, compress maai, enter the pocket.
Jō strategy: maintain or restore distance; do not get caught inside the cut radius.
The opening stances reflect those intentions.
Initial Positions
Bokken (Sword)
Migi-hanmi, gedan-no-kamae. Blade angled down, right foot forward. This shields the lead leg, closes the low line, and forces the jō to commit to chūdan or above.
Jō
Standard chūdan junte tsuki (#1).
The Paired Sequence
Jō – Chūdan Tsuki
Sword response:
As the thrust launches, the swordsman switches to hidari-hanmi while advancing, slipping the thrust offline. The bokken does not parry or bat the staff aside; instead the swordsman uses the flat of the blade to press-check the jō, riding it without deflecting, to create a direct line to the jō-holder’s front hand. This is kenjutsu logic: close without losing the line to the weapon.
Jō – Cover (Spiral Withdraw)
The jō extracts itself from the bind using the standard spiral withdraw, retreating by at least the same distance the sword advanced. Establish equal or better maai.
Followed immediately by:
Jō – Yokomen #1
A sharp, descending cut aimed at the swordsman’s left temple (jōdan).
Sword – Absorb and Drop-Cut
At the moment of yokomen:
The sword’s last position is left foot forward, blade parallel to the ground from the earlier press-check. The jō threatens the left temple.
The swordsman raises both hands vertically, placing the flat of the bokken against the left biceps to absorb the descending strike (a koryū-style body-line shield, not a static block).
Then immediately:
Advance with the right foot; drop the hips to pass under the jō’s follow-through arc;
Deliver a descending cut to the jō-bearer’s right leg: the femoral line.
The left leg presses rearward to help achieve the low posture needed to survive any continuing yokomen pressure.
This is classic “close-under-the-arc” sword logic: steal the inside lane and cut the closest target, the leg, and supporting structure.
Jō – Hasso (Clearing Turn)
Because the swordsman targets the jō-user’s forward (right) leg, the jō-bearer steps back (to remove the target) and performs hasso, striking the sword outward to the wielder’s left and clearing the line.
This clearing beat creates the opening for:
Jō – Yokomen #2
A second yokomen, this one delivered more like a ken strike from the flank.
Sword – Slip Inside and Countercut
As the second yokomen arcs toward the left temple again, the swordsman first steps the left foot farther left, slipping under thejō’s arc.
The bokken’s tip (kissaki) comes to centerline as the hands press straight up, creating a temporary shield should the jō redirect toward the right.
Crucially, the bokken is not trapping or blocking the jō; this is evasion and positional reset. The goal is to move the sword to the outside line, where it can strike the jō-bearer’s forward (right) hand.
Once the yokomen is slipped: Switch to migi-hanmi and snap the bokken over in a vertical cut aimed at the jō-bearer’s hand.
Sword logic: create a blind angle, reclaim initiative, attack the weapon hand.
Jō – Rear Tsuki (Ushiro Tsuki)
As the swordsman countercuts, the jō-bearer performs the standard movement #6:
Retreat the body straight back (no hanmi change); Rear tsuki into the opponent behind you (foot target).
This is identical to the original kumijō: the logic now emphasizes removing the hands as a target.
Jō – Low-Line Leg Strike
Immediately after the rear thrust, the jō-bearer re-enters to deliver the sweeping strike to the swordsman’s right knee/patella, movement #7.
This maintains the principle: if the sword closes, attack the base.
Sword – Low Switch and Vertical Cut
The swordsman performs a fast hanmi switch to protect the right leg, pulling it offline.
From this new stance the bokken snaps into another vertical cut: again targeting the jō-bearer’s forward hand.
Sword strategy remains consistent: eliminate the hands that control the longer weapon.
Jō – Final Hand-Break
The jō-bearer executes the standard final movement:
Sliding retreat accompanied by a hand-break strike (#8) using the flipping action that mirrors kote-gaeshi mechanics.
This ends the cycle and returns the jō-bearer to the starting left hanmi, ready to repeat the sequence.
Tactical Summary
The sequence preserves the original kumijō logic exactly, but expresses its purpose through the realities of mismatched weapons.
The sword constantly seeks compression of distance: slipping lines, passing under arcs, and targeting the jō-bearer’s forwardmost anatomical targets (legs and hands). This is how a shorter weapon defeats a longer one.
The jō strives to restore or maintain distance: spiraling withdraws, yokomen arcs from outside centerline, and low-line suppression to keep the swordsman from entering the pocket.
Bunkai Logic
(How each movement solves a tactical problem created by the last one.)
This bunkai explanation operates under real constraints: Bokken is shorter but faster; Jō is longer but harder to re-aim once committed; Whoever controls maai + initiative + line wins; The weapons do not “meet” as equals; they solve different problems. Each count below explains the problem, the response, and the principle revealed.
COUNT 1 — Junte Chūdan Tsuki
Problem:
The sword can kill you with one decisive entry if it gets inside your radius.
Jō Logic:
Start with the longest, straightest attack: chūdan tsuki. This forces the swordsman to commit to a line and show his entry angle.
Sword Logic:
Slip the thrust. Do not block: blocking gets you killed because it keeps you on the defense; always behind the OODA loop initiative. Use the outside line to pass the thrust and threaten the jō-hand.
Principle:
Length forces declaration; angle steals initiative.
COUNT 2 — Cover (Spiral Withdraw)
Problem:
Your thrust has been defeated. The sword has entered on an angle (outside line) and is now threatening your hand.
Jō Logic:
Withdraw in a spiral cover. Why spiral? Because a linear pull-out merely drags the weapon and may not release a swordsman’s bind. The spiral unthreads the bind and re-establishes range.
Secondary Logic:
The cover protects all three lines (high–mid–low). Against a sharp weapon, ambiguity kills; broad-line protection preserves initiative.
Principle:
Distance regained is initiative regained. Spirals solve binds.
COUNT 3 — Yokomen #1
Problem:
The sword has gotten too close; unless you punish and close the sword’s line, it will enter again.
Jō Logic:
Yokomen from outside the sword’s center. This forces the swordsman to defend with his body structure, not his edge.
Sword Logic:
Absorb the cut with the flat to the upper arm: not a block, but a load-bearing deflection. Once absorbed, drop under the arc to strike the jō-bearer’s leg. The sword targets the base, because removing mobility wins the fight.
Principle:
High-line pressure creates low-line vulnerability. Sword wins by entering under arcs.
COUNT 4 — Hasso (Clearing Turn)
Problem:
Your leg is about to be cut and you are extended from yokomen #1 and committed to the right side.
Jō Logic:
Hasso is not just a pose (kamae); it’s a rescue turn. You’re removing your vulnerable right leg from the sword’s line while simultaneously batting the sword offline to the wielder’s left. The turn also gives you a new angle of attack.
Principle:
Clearing beats are survival beats; position recovered is authority recovered.
COUNT 5 — Yokomen #2
Problem:
The sword is still close enough to re-enter. You must prevent it.
Jō Logic:
Second yokomen is delivered like a sword cut: fast, vertical, decisive. You punish the angle the sword just took by striking into the space it moved through.
Sword Logic:
But the swordsman does not block. He sidesteps left, getting under the arc and slipping to the outside line: the same line from which hand-cuts become easiest.
Principle:
Every cut is an invitation to step off-line. The sword survives by never meeting power directly.
COUNT 6 — Rear Tsuki
Problem:
Your hands are about to be attacked and, secondarily, your attention is too committed forward. In paired weapon kata, the implied logic is always: If you focus only on the front, you die from the rear.
Jō Logic:
Rear tsuki is a structural correction: Remove the target and re-establish distance; and close a blind-side approach. It also counters the sword’s attempt to gain initiative through angle.
Principle:
First rule: do not get hit. The constant reminder, a weapon fight is 360° and threats from the rear must always be addressable.
COUNT 7 — Low-Line Leg Strike
Problem:
As you reorient, the sword is re-entering with a vertical cut to your hand.
Jō Logic:
You cannot win a direct entry contest versus the sword’s speed. So you attack the foundation again: the swordsman’s knee. A low-line strike forces the sword to defend its base and interrupts the vertical cut.
Sword Logic:
Switches hanmi to protect the right leg. This is a koryū reflex: protect structure first, posture second.
Principle:
Base before blade. Whoever loses structure first loses the exchange.
COUNT 8 — Final Hand-Break
Problem:
The sword is mid-cut, inside the radius, and structurally aligned to kill your hand.
Jō Logic:
Flip the jō (kotegaeshi mechanics). This is the fastest way to change the top of the staff from passive to destructive. The arc is micro-short but extremely fast; it outpaces the sword’s recovery. The strike lands on the hand; the command center of the sword. Destroy the hand, the fight is over (de-fang the snake).
Principle:
Weapons end fights by disabling command points: hands, head, base.
Timing Matrix
(beats indicated as: 1 — 2 — 3 — etc. Half-beats as “&.”)
| Count | Jō Beat | Sword Beat | Initiative | Maai |
|---|---|---|---|---|
| 1 | 1 (tsuki) | 1-& slip, 2 bind | Jō → Sword | to-ma → chūma |
| 2 | 2-& extract, 3 cover | — | Jō | chūma (restored) |
| 3 | 4 yokomen | 4-& absorb, 5 leg cut | Jō → Sword | closing → uchi-ma |
| 4 | 5-& recognition, 6 hasso | — | Sword → Jō | micro-expansion |
| 5 | 7 yokomen | 7-& slip, 8 cut | Jō → Sword | angled → uchi-ma |
| 6 | 8-& retreat, 9 rear tsuki | — | Jō (go-no-sen) | distal chūma |
| 7 | 9-& pivot, 10 knee strike | 10-& hanmi, 11 hand cut | Jō → Sword | compress → uchi-ma |
| 8 | 11-& reading, 12 flip | — | Jō | reset to starting maai |
COUNT 1 — Junte Chūdan Tsuki
Beat Structure:
- 1: Jō initiates thrust. (sen / initiative)
- 1-&: Sword advances while switching hanmi, slipping the line (sen-no-sen)
- 2: Sword establishes the press-check bind.
Maai Shift:
- Begins at to-ma (long range) → compresses to chūma.
Initiative:
- Jō initiates.
- Sword seizes initiative on the half-beat during the slip.
COUNT 2 — Cover (Spiral Withdraw)
Beat Structure:
- 2-&: Jō begins extraction from bind (go-no-sen)
- 3: Jō completes cover, restoring distance.
- 3-&: Jō loads for yokomen #1.
Maai Shift:
- Sword compresses (end of count 1).
- Jō restores to neutral chūma.
Initiative:
- Initiative (sen) passes back to jō on the successful break of connection.
COUNT 3 — Yokomen #1
Beat Structure:
- 4: Jō delivers yokomen.
- 4-&: Sword lifts to absorb, flat-to-biceps shield (go-no-sen)
- 5: Sword drops under the arc to attack the jō-bearer’s leg.
Maai Shift:
- Yokomen is delivered in closing maai.
- Sword collapses distance further, entering uchi-ma (striking range).
Initiative:
- Jō has initiative for half a beat.
- Sword steals it decisively on 5 with the leg attack.
COUNT 4 — Hasso (Clearing Turn)
Beat Structure:
- 5-&: Jō recognizes the low-line threat.
- 6: Hasso turn; jō clears the sword’s cut.
- 6-&: Jō loads for yokomen #2.
Maai Shift:
- Sword compresses → Jō slightly expands maai but stays inside mid-range.
Initiative:
- Sword held initiative briefly after the leg cut.
- Jō regains it on the clearing beat.
COUNT 5 — Yokomen #2
Beat Structure:
- 7: Jō strikes yokomen from the flank.
- 7-&: Sword steps left, slipping the arc without contacting it.
- 8: Sword switches to migi-hanmi and snaps a vertical hand cut.
Maai Shift:
- Initial yokomen is closing.
- Sword’s sidestep shifts engagement to angled chūma (outside line).
- Sword re-enters to uchi-ma with the hand cut.
Initiative:
- Jō initiates.
- Sword takes sen-no-sen on 7-&.
- By 8, initiative is fully sword-dominant.
COUNT 6 — Rear Tsuki (Ushiro Tsuki)
Beat Structure:
- 8-&: Jō retreats bodily (no stance change).
- 9: Rear tsuki delivered to rear opponent’s foot.
Maai Shift:
- Jō extends distance backward from the sword.
- Engagement momentarily becomes distal chūma.
Initiative:
- The rear tsuki is a go-no-sen response: initiative reclaimed through repositioning rather than direct contest.
COUNT 7 — Low-Line Strike to the Knee
Beat Structure:
- 9-&: Jō pivots back to the frontal opponent.
- 10: Sweeping strike to swordsman’s right knee.
- 10-&: Sword switches hanmi to protect the leg.
- 11: Sword returns with a vertical cut to the jō-hand.
Maai Shift:
- Jō compresses rapidly to attack the base.
- Sword evades and re-enters the pocket.
Initiative:
- Jō initiates the knee destruction.
- Sword reclaims initiative with a one-beat later hand attack.
COUNT 8 — Final Hand-Break (Kote-Uchi Flip)
Beat Structure:
- 11-&: Jō senses the vertical hand-cut pressure.
- 12: Sliding retreat and flipping strike to the swordsman’s lead hand.
This is a fast, whip-like beat; both sides operate almost simultaneously.
Maai Shift:
- Jō re-establishes safe maai (returning to the starting point).
- Sword is forced to disengage by the whip strike.
Initiative:
- Jō ends the sequence with final initiative, resetting the cycle.
________________
Glossary
Chūma / Chūma-long / Chūma-close (中間) Middle-distance ranges. These modulate through Counts 1–4.
Go-no-sen (後の先) Late initiative; countering at the moment of attack.
Legato (tempo) Continuous flow between sharp actions. Used in Count 2 and 4.
Sen (先) Initiative taken first. Jō initiates sen in Count 1.
Sen-no-sen (先の先) Pre-initiative, acting as the opponent initiates. Sword uses this in Counts 1 and 5.
Sforzando (tempo) Explosive beat. Counts 1, 3, 5, and 7 are sforzando entries.
Staccato (tempo) Sharp, discrete beat. Appears in transitions and closures.
To-ma (遠間) Longest distance where weapons cannot reach without advancing. The opening interval of Count 1.
Uchi-ma (内間) Inside range where both sides can strike without stepping. Crisis points in Counts 3, 5, and 7.

One thought on “JO v BOKKEN”