Kiai (気合)
I have mused openly in the past about the disappearance of the kiai from Aikido. O’Sensei was reported to have a very powerful kiai that could be heard from miles away. Traditional arts continue to employ kiai, so why the downplay in Aikido?
O Sensei kiai and kotodama video
Kiai is ‘simply a shout,’ the forceful inner and outer projection of kokyu (controlled breathing), but it has applications, physical and mental, and spiritual. Kiai is generated by using fukushiki kokyu, deep abdominal breathing, and ki ryoku indicates the level of the practitioner’s coordination of body and mind. It is a perfectly concentrated burst of energy, only part of which is audible. It is, therefore, very easy to find mystical nonsense regarding kiai (video and narrative) that extol kiai as if it were an end unto itself. Nevertheless, for an American pragmatist, kiai can remain a critical aspect of training.
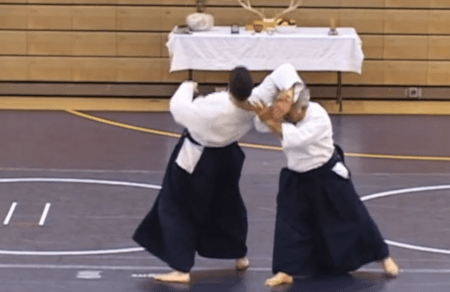
Traditionally, kiai is uttered when performing an attacking move.
O’Sensei in the “Secret Teachings of Budo”
#33 Master the voice that shouts “Yah” / See through to reality / Remain unmoved by the enemy ploys
This is tradition codifying sound physiology and psychology.
Physiology first: striking power is maximized through fluid motion combined with tension at the proper moment. Fluid because it will increase speed and tension because your fist/sword must convey the force effectively. Look to that sweet science of modern boxing. Note the timed short sharp exhales on the strikes. Power is amplified when breathing out. Simply try punching a heavy bag on an inhale cycle. Then try again with an exhale. Nothing mystical, just an acknowledgement of human physiology. It is an important skill – just like controlled breathing when taking that long-range rifle shot. So the kiai at the moment of maximum exertion reflects the kill stroke in the kata – a denotation: “this is when it happened.” This is exemplified in modern kendo which requires a good kiai for scoring.
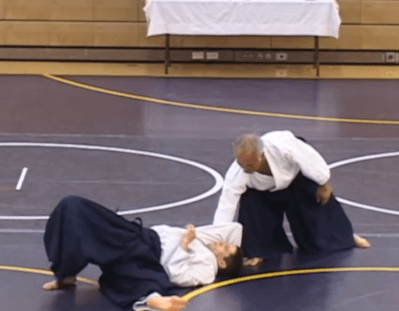
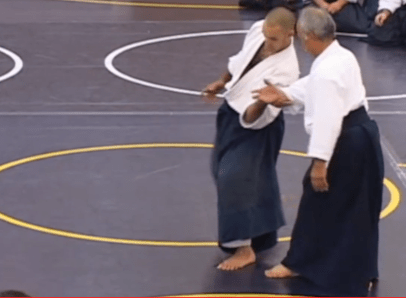
Traditionally, this use of kiai is chu kiai, also called kakegoe or a kiai at the moment of impact, is deployed during the attack. Physiologically, the body is tensed against impact (exhalation). The kiai tightens the lower abdomen, diaphragm and intercostal muscles. The actual moment of focus is called kime and the attack at this time is called kimete, or deciding blow. The sound associated with chu kiai is ‘Sa!’ The culmination of many traditional forms conclude with a go kiai. This kiai is given after a technique to signify the intention of continuing combat if necessary, as well as continued intimidation of an opponent. The sound associated with go kiai is ‘To!’
But for me it isn’t the proper spirit that is primary, rather good physiology and logic: you must breathe out during strikes and throws and during movement. Try another simple experiment: try moving laterally quickly while breathing out, easier to do breathing in. In class with the sword I remind people, breath in while raising the weapon, out while striking. Punch the same way.
As an observation, even a well condition athlete who is new to training a martial art can easily find himself ‘winded’ during class. Why? It isn’t lack of cardio conditioning. It is that the pattern of breathing is wrong. Under stress people hold their breath or fail to breathe. One needs learn how to breathe properly to remain relaxed and also prevent oxygen deprivation. Therefore, incorporate kiai as a reminder to breathe properly. (And by showing exactly when to strike and breathe out, it forces the next cycle of breathing in.)
And what about the psychological impact? No matter how muddle-headed marketing wants to portray it, these are combative motions we train. As such, we need to recognize that combat is traumatic and scary. If you do not agree I submit you are either (1) a psychopath or (2) deluding yourself.
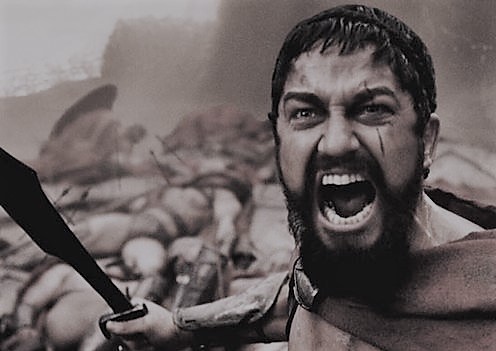
Therefore, the primal reason for kiai is a battle cry. A rebel yell. A galvanizing tool to simultaneously invoke uncertainty or fear in your enemy and instill moral courage in yourself and comrades. The initial kiai, is the sho kiai. Sho kiai is given before an attack to startle the opponent and to bolster one’s courage. The sound associated with sho kiai is ‘Ei!’
So what to make of those stories of the mystical power attributed to the shout of any given martial artist in the past?[1] I believe them insofar as I too have been out-psyched by teachers. Some of it is an artifact of training (in this context, the well-documented phenomena that humans attribute more perceived power to those in a position of hierarchical authority), but some of it is genuine recognition that this other person has more force of will. The Importance of Winning is real. A kiai is a simple vocalization of will. And sound has a powerful impact on us as humans. Think of the power of music. There is a great deal of literature out there on the reasons – go back and read Pythagoras to delve the mystery if you like, but suffice to say that sound can be weaponized. Have you paid attention to what happened in the US embassy in Cuba?
To continue with heretical thoughts: so why no kiai in modern Aikido? Marketing. The older instructors still used kiai, but the generation taught by Kisshomaru Ueshiba less so. Much like shedding kotodama and the more esoteric aspects of O’Sensei’s training, I think it was done to make Aikido more accessible to a wider audience: layer in old-school misogi training, add a dash of Oomoto religion and the attendance rate drops and your cult status rises. Frankly I think it was a shrewd business decision to help expand Aikido’s appeal to an international (and largely non-Japanese) audience.
There are sound reasons to incorporate kiai into training. But blind tradition is not among them.

________________________
[1] Of course I go back to the Ancient Greeks for inspiration and provenance: Diomedes in the Illiad was know to have a powerful war cry and both the Hellenes and Akkadians entered battle shouting “Alala” (Ἀλαλά “battle-” or “war-cry”) which is reported to mimic the sound of an owl, but also refers to the goddess Alala who is the battle-cry personified and is the daughter of Polemos – a minor god of war. In The Western Way of War, Hanson describes the sounds of battle, the limitations imposed by the Corinthian helmet on hearing and makes only a brief mention of the war-cries that he transcribes as elelelen (1989:149).
As a research suggestion, it seems that Western tradition might be at a higher pitch – be far shriller – than the Eastern traditions. If the ancient Greeks sounded like owls, and if Confederate soldiers yelped like coyote – it appears the eastern kiai is a low resonance, lower frequency shout. The high-lung vs low belly sourcing of sound?
A discussion with Master James Keating on this topic:
“Kiai that goes high note (bird sounds, screechs) cause the opponent to lighten, to rise, float even. Done close, right in the ear perhaps. Kiai that go low, bass growl w/ gesture low, cause enemy to sink, become heavy, induce fear (Infra-sound, tigers growl, vibrate). Face on – Don Angier knew a lot of this stuff. He knew my teacher David Harris, and Bernie Lau as well.
In silat, in some healing cults and animal training magicians = a shared trait – the breath is used as would a ki-ai. I mean like blowing out a candle or blowing a kiss to someone. Quiet. / IE: Air – a puff of air. Oddly enuff this is rarely spoken about. But it works well, beyond just some asshole blowing their breath in yer face, when seen metaphysically it is magic in a pure form. The breath – goes right in them, they feel it. It carries your mental command(s). Air, sometimes from a powerful blow which is deliberately held back a little and just the wind (force wave) hits the enemy in the face – so different it catches one off guard. They stop, daze-up and re-consider. An act of power, without power it’s just air and shall do nothing, personal power is a must in this game – the force behind the flow, the flow within the force.”
Further reflections from Master Keating:
The Voice is a martial power unto itself. To use the voice in training has always been a big piece of many martial arts. From cadence count to kiai-jitsu it is an element of training that not many approach in today’s MMA dominated world. Kiai is no longer used as much as it once was. Kiai not only serves as a ‘spirit shout‘ but as a form of breathing as well. This type of breathing can be done in a variety of ways. Kiai can be of a hissing nature, a sharp bark, a high pitched whistle, a low animal growl.
Some kiai cause a drop in the arterial blood pressure. Others can make a man go physically weak for a few moments in time. Of course we all know that a sudden noise can startle. But kiai can go beyond that mere effect. A kiai can help tighten muscles and deaden the force of a blow. Threat and faking can be produced from the kiai (spirit shout) as well. This is a sound based illusion, a seemingly real attack, but only sound. Physical attack first, retreat and use the voice as a fake, then attack with physical force and kiai together. A one, a-two, a-three type of setup. Force, confusion, illusion, sound and threat. Get’em now mate! Kiai is valuable when used right. When used poorly or over-used, it becomes cheesy and beginner-ish. Kiai controls pain too. Why do you think they teach women to breathe in certain ways during the birthing process? Pain control is why. Muscle control and concentration too. Stamina!
Weak kiai is also worthless, half hearted grunts & oinks simply won’t cut it. It invites a beating – learn to hiss and roar, breath fire and shit burning coals. Kiai gives many men courage. Breathing in the correct manner during actual combat sounds demonic to the untrained ear and mind. Chilling & threatening. And yes, if some loud noise surprises you or if someone uses a kiai against you, be sure that you immediately kiai (scream) back – fast and strong. Counter the effects of their shout by mirroring them, scream back even louder than their shout! Back at ya dude! Voice and kiai can become a sonic attack. Do some actual damage. This requires years of training the voice. Start slowly, you can fuck your voice up by over doing it. Slow and easy, build your voice power. It was said that the Aikido Master Tohei Sensei practiced his kiai in the mornings. Just as he would practice any technique. Intonation, kiai, mantra and chant – all equal breath & voice power. Some out there will point out that real Tai Chi doesn’t use any spirit shouts, just silent breathing. Ok, but then explain Tai Chi’s “hen and ha” sounds – yes, important elements many tai chi players today leave out. But why? What about each organ having a sound, tonification is the idea. Sound – vibration. Vibration is just about everything that exists!
There are some universal breathing forms out there. Iron thread set, san chin, tensho, go cho kuen, yogas praniyama and more. I’ll say again, voice and breath are partners. Some think that Sanchin kata is a form which only certain types of Okinawan karate use. But, Kung fu also uses the Sanchin form. Here is an interesting comparison between Kung Fu, Karate and its variations. I have done Sanchin & Go Cho-Kuen since I was a boy. White Crane as well. So these sets and the breathing they teach are my friends. I could go on and on about how they develop you. How they change your physical body – similar to the I-chin-ching muscle change classic.
Here are some further insights you may find helpful. Then again, some will not, they will mock this stuff as the fools they are. So be it then, no offense taken.